



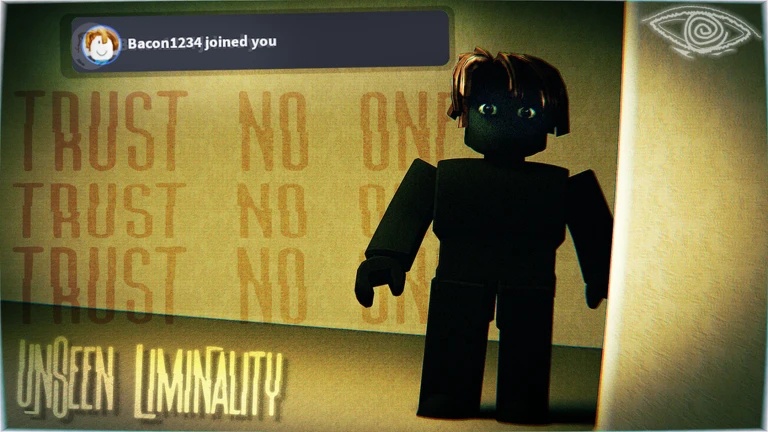
Unseen Liminality has quickly become one of the more recognizable horror experiences on Roblox, combining classic Backrooms concepts with exploration-focused gameplay. Instead of relying solely on jump scares, the game creates tension through environmental storytelling, maze-like level design, and the constant feeling that something is hiding just around the next corner.

If you’re having trouble understanding the game’s layout or surviving encounters with its most dangerous creatures, this guide explains every major level, hidden location, and hostile entity currently found in Unseen Liminality.
Quick Reference: Level Overview
| LEVEL NAME | TYPE | FEATURES & HAZARDS |
| The Lobby | Main Level | Endless yellow hallways, buzzing fluorescent lights, dark corners |
| Pool Rooms | Main / Sub-Level | Tile-covered corridors, shallow and deep-water pools, heavy acoustics |
| The End | Hidden Area | A red-lit library sub-level hidden inside The Lobby |
| Cap’n Clark’s Unseen Empire | Point of Interest / Sub-Zone | Unique hideout area located deep within the exploration route |
Understanding the Gameplay of Unseen Liminality
Unlike many traditional Roblox horror games, Unseen Liminality doesn’t follow a strictly linear progression system. You’ll move between primary levels, discover concealed sub-levels, and occasionally stumble into optional areas that exist mainly for exploration. Some locations contain valuable secrets, while others function as atmospheric spaces. Learning how these areas connect to one another is one of the most important skills you’ll develop.
Main Levels & Zones Explained
1. The Lobby (Main Hub)
The Lobby serves as the starting point and acts as the central area of the game. Visually, it resembles the classic Backrooms environment. Endless yellow wallpaper, old carpeting, dim corners, and the constant buzz of fluorescent lighting create a sense of isolation.

Difficulty: Easy to Moderate
Primary Objectives:
- Explore the environment.
- Locate hidden photographs and collectibles.
- Discover entrances to deeper areas.
- Avoid hostile entities.
Navigation Tips for The Lobby
- Use Environmental Landmarks: One of the biggest mistakes new players make is assuming that every hallway is identical. Small details can help you distinguish one area from another. Damaged walls, missing ceiling panels, darker wallpaper sections, and broken light fixtures can all serve as useful navigation markers.
- Pay Attention to Audio: Sound plays a major role throughout Unseen Liminality. Changes in the familiar electrical hum often indicate that you’ve entered a new section of the map. Footsteps, unusual mechanical noises, and distorted sound effects can also warn you that an entity is nearby.
- Search Every Dead End: Areas that initially appear empty sometimes hide secret transitions. Examine walls carefully and investigate suspicious corners. Some of the game’s most interesting locations are hidden behind seemingly ordinary surfaces.

2. The Pool Rooms
The Pool Rooms offer a completely different atmosphere. The familiar yellow walls disappear and are replaced by bright tiles, shallow pools, submerged chambers, and vast open spaces filled with echoes. The environment appears less threatening at first glance, but the layout can be even more confusing than The Lobby.
Difficulty: Moderate
Primary Objectives:
- Explore flooded pathways.
- Maintain stealth.
- Avoid becoming trapped in circular routes.
- Continue searching for progression points.
Navigation Tips for The Pool Rooms
- Avoid Making Unnecessary Noise: Walking through water creates additional sound that can reveal your position. Whenever possible, use dry platforms or tiled walkways instead of “splashing”.
- Use Corners to Your Advantage: Long corridors are rarely safe. If an entity spots you, running in a straight line isn’t the best solution. The numerous intersections and sharp turns throughout The Pool Rooms provide better opportunities for escaping.
- Watch for Vertical Pathways: Many players focus entirely on horizontal exploration and overlook elevated platforms, staircases, and upper walkways. Looking up can sometimes reveal hidden routes that aren’t immediately visible.
Hidden Areas & Sub-Levels
Cap’n Clark’s Unseen Empire
Category: Secret Zone
Cap’n Clark’s Unseen Empire is one of the game’s most unusual locations. Instead of horror, this area introduces a more playful and surreal atmosphere. Arcade machines, mascot-themed decorations, storage areas, and hidden easter eggs distinguish it from the more traditional Backrooms-inspired environments. Exploring every corner of this zone can uncover details that many players completely miss during their first playthrough.

The End
Category: Hidden Sub-Level
Despite its name, The End doesn’t represent the “end” of the game. This concealed location exists within the deeper layers of The Lobby and features a darker aesthetic. Red lighting, distorted architecture, and glitched visual effects create an environment that feels deliberately unstable.

Accessing The End requires heavy exploration, as its entrance isn’t immediately noticeable. Players who rush through The Lobby often walk directly past the hidden transition point without realizing it.
Hostile Entities & Monsters Guide
The environments themselves may be unsettling, but the game’s entities create the greatest sense of danger. Each entity behaves differently, which means survival often depends on understanding their patterns rather than simply running away.
1. The Headhunter
Found In: The Lobby & The End
Threat Level: Very High
The Headhunter is one of the deadliest entities in Unseen Liminality. Unlike traditional monsters, it doesn’t use visual detection. Instead, it tracks players through multiple phases that keep increasing in aggression. These phases are:

- Searching: The creature slowly moves through the level while looking for players.
- Stalking: Once it identifies a target, it begins following them from a distance.
- Hunting: The pursuit becomes more aggressive, and escape becomes more difficult.
- Mimicking: After eliminating a player, it temporarily adopts a disguise before searching for another victim.
How to Survive the Headhunter
- Avoid looking directly at it.
- Change levels if possible.
- Don’t remain stationary.
- Keep your distance, even if another player appears to be the primary target.
2. The Mimic
Found In: The Lobby, The Pool Rooms, The End
Threat Level: Very High
The Mimic relies on deception. After spawning, it impersonates one of the players from your Roblox friends list and may even generate a fake system notification to convince you that a friend has joined the server. Its behavior is designed to lower your guard. When you approach, it reveals its true form. Fortunately, the Mimic eventually disappears if it fails to catch you.
How to Survive the Mimic
- Verify every new player through the server list.
- Don’t trust unexpected system notifications.
- Keep your distance from suspicious characters.
- Use doors and corners to break visual contact during a chase.
3. Still Life
Found In: Legacy areas, deep exploration zones
Threat Level: High
Still Life appears as an immobile, distorted figure. The creature doesn’t rely on sight. Instead, it reacts to movement and sound. Loud footsteps can trigger an attack. Conventional hiding spots such as doors offer little protection against this creature.
How to Survive Still Life
- Walk slowly.
- Use the crouch mechanic.
- Avoid unnecessary movement.
- Hide inside vents and narrow crawl spaces whenever possible.

4. Cap’n Clark & Minor Entities
Not every creature in Unseen Liminality behaves like an active hunter. Cap’n Clark primarily functions as an environmental character and point of interest rather than a constant threat.
Other enemies, including The Caroler and moving mannequins, rely on psychological tricks. Many of them appear completely harmless until you look away. If you encounter these entities, maintain visual contact while slowly creating distance between yourself and the threat.
Surviving the uncanny halls of Unseen Liminality requires keen spatial awareness, careful movement, and a thorough understanding of each entity’s distinct behavior. Rather than relying on simple sprint mechanics, success comes down to listening for environmental cues, utilizing vertical routes, and verifying who or what is moving alongside you.
Keep your stamina preserved for actual chases, avoid trusting sudden system notifications, and always map out a fallback route as you explore deeper into the Backrooms.